In this post I will show you, how you can trace your data from Database to disk where it is stored and how you can read it directly from disk
So let us quickly setup the environmentStep1> Login to DB Instance and Create a Tablespace
SQL>create tablespace TRACE_DATA datafile '+TEST_DATA';

Step2> Find File# and Name of The Datafile
SQL> col "File" for a80
select f.FILE#, f.NAME "File", t.NAME "Tablespace"
from V$DATAFILE f, V$TABLESPACE t
where t.NAME='TRACE_DATA' and f.TS# = t.TS#;

Step3> Create A Table in TRACE_DATA Tablespace and Insert few Records
SQL>create table DATA_TRACE_TEST (n number, name varchar2(16)) tablespace TRACE_DATA;
SQL>insert into DATA_TRACE_TEST values (2, 'DEBITCARD');
SQL> commit;

Step4> Find the Information of the Inserted Rows
SQL>select ROWID, NAME from DATA_TRACE_TEST;

Step5> Find the DB Block Number for Above Rows
SQL> select DBMS_ROWID.ROWID_BLOCK_NUMBER('AAASOXAAJAAAACEAAB') "Block number" from DUAL;

At this point we know that our data is stored in Tablespace TRACE_DATA and physically in Datafile a datafile file#9 (+TEST_DATA/WDTESTDBA/DATAFILE/trace_data.256.984068463) and corresponding ASM file number for datafile#9 is 256. In File#9 my data is exactly located in Block number 132. Let us deep dive further and Identify which disk is underneath
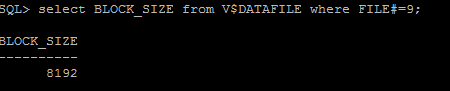
Step6> Find the Database Block Size for File#9 (File# found in Step 2)
SQL>select BLOCK_SIZE from V$DATAFILE where FILE#=9;
Step7> From ASM instance Identify the DG Number where your Datafile is stored
SQL> select GROUP_NUMBER,NAME from v$asm_diskgroup where name='TEST_DATA';

Step8> From ASM Instance Identify the Extent Distribution for ASM File 256 Stored in Diskgroup Number 4
SQL>select XNUM_KFFXP, -- extent number
DISK_KFFXP, -- disk number
AU_KFFXP -- AU number
from X$KFFXP
where NUMBER_KFFXP=256 -- ASM file number (256)
AND GROUP_KFFXP=4 -- ASM DG Number (1);
DISK_KFFXP, -- disk number
AU_KFFXP -- AU number
from X$KFFXP
where NUMBER_KFFXP=256 -- ASM file number (256)
AND GROUP_KFFXP=4 -- ASM DG Number (1);

As you can see from the above output the extent is distributed across all the disks and each extent is available on disk 0 as well as on disk 1, this is because the diskgroup redundancy is normal and therefore 2 copies of each extent. From the above output we can find the AU for each extent.
In next step I will find out the AU size
Step9> Find Allocation Unit Size for Diskgroup 4
SQL> select VALUE from V$ASM_ATTRIBUTE where NAME='au_size' and GROUP_NUMBER=4;

So AU_SIZE for DG 4 is 1MB.
Block Size=8K <=Step6
AU_SIZE=1M <= Step9
1M/8K=128 <= and therefore each AU can hold 128 DB Blocks each of 8K in Size.
From Step5 I know that my Data is stored in Block Number 132. Which is basically 4th (132-128) block in the 2nd Extent, in ASM file 256 (see the ASM file name in Step2). From Step8 You can see the 2nd extent (XNUM_KFFXP=1) is stored in disk 0 and 1 in AU 62, so Let us find the name of these disks and extract the AU62 from the disk
Step10> Find the Disk Name from Disk Number
SQL> select DISK_NUMBER, NAME from V$ASM_DISK where DISK_NUMBER in (0,1) and GROUP_NUMBER=4;

I am using AFD so I can further list the disk as it appears to OS using afd_lsdsk command
$ asmcmd afd_lsdsk |grep TEST

Step11> Read the Data Directly from Disk
Now we know that my data is stored in AU 62 on disks /dev/xvde and /dev/xvdf. I can read it directly from disk
A> Extract AU 62 from disk
# dd if=/dev/xvde bs=1024k count=1 skip=62 of=xvde_AU62.dd 1+0 records in
1+0 records out
1048576 bytes (1.0 MB) copied, 0.00244138 s, 430 MB/s
1+0 records out
1048576 bytes (1.0 MB) copied, 0.00244138 s, 430 MB/s
B> Extract 4th Block from xvde_AU62.dd
# dd if=xvde_AU62.dd bs=8k count=1 skip=4 of=132_block.dd
1+0 records in
1+0 records out
8192 bytes (8.2 kB) copied, 0.000342058 s, 23.9 MB/s
1+0 records in
1+0 records out
8192 bytes (8.2 kB) copied, 0.000342058 s, 23.9 MB/s
C> Read the Content of the File 132_block.dd using strings or od command
#strings 132_block.dd |grep CARD
DEBITCARD,
CREDITCARD
CREDITCARD

OR
# od -c 132_block.dd
0000000 006 242 \0 \0 204 \0 @ 002 220 313 032 \0 \0 \0 001 006
0000020 353 363 \0 \0 001 \0 \0 \0 227 # 001 \0 210 313 032 \0
.....................................................................................................................
.....................................................................................................................
0017720 224 \0 001 002 301 002 002 301 004 004 303 , 001 002 002 301
0017740 003 \t D E B I T C A R D , 001 002 002 301
0017760 002 \n C R E D I T C A R D 001 006 220 313
0020000
Follow the Steps A, B and C to validate the presence of DATA in /dev/xvdf (ie disk 1). Since I was using normal redundancy disk group there is 2 copy of the data stored in different FG to tolerate the disk failure.

No comments:
Post a Comment